Resources
Tip
To access these settings, you will need to be in a group that has access to the Admin Module
Types of Resources
Resources can be any object, room, or person you'd like to schedule and track. It's important to select the type of resource as FoxOMS has slightly different behaviours for each one.
People
Living and breathing, these 'human resources' drive your business to achieve your goals. They need to exist as a contact (but don't need to be selected as a user) before they can be added as a resource.
Rooms
For example; Edit Suites, Meeting Rooms, Studios or any other space that you'd like to track. Rooms are the default resource type.
Equipment
Any equipment such as cameras, laptops, tablets or any other equipment that can be booked. This type of resource will also have added inventory tracking in a future version of FoxOMS, eg purchasing and warranty information.
Action Resources
Can be used to show common types of staff actions, such as Sick Leave, Holidays, Training etc.
Create/Edit a Resource
Room, Equipment and Action resources can all be created and modified in the Admin -> Resources page. To add a Human resource you must go to the Admin -> People page and add or modify an existing person to be a Resource.
To create a resource, go to the Admin -> Resources page and click New -> Resource.
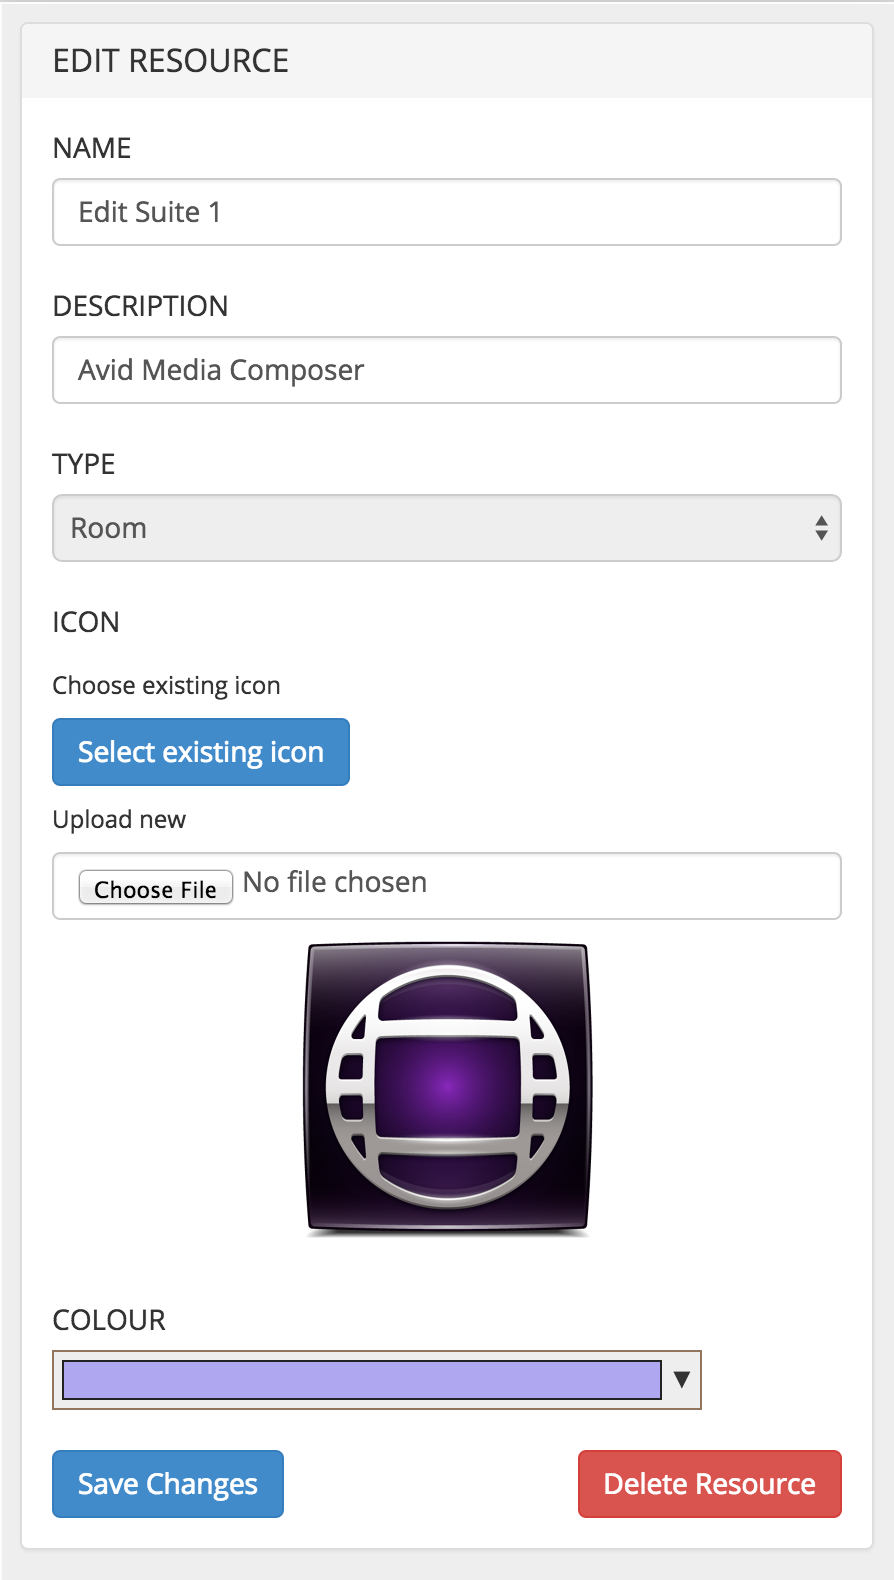
Fill in the Name, Description (optional) and select the Resource Type from the select menu. You can also choose to upload a file for the icon and select a colour for this resource. Click Save Changes to create the new resource.
- The description field maps to the scheduler timeline interface and could be used to give an overview of a rooms main function.
- The type field can either be set to Room, Equipment or Action.
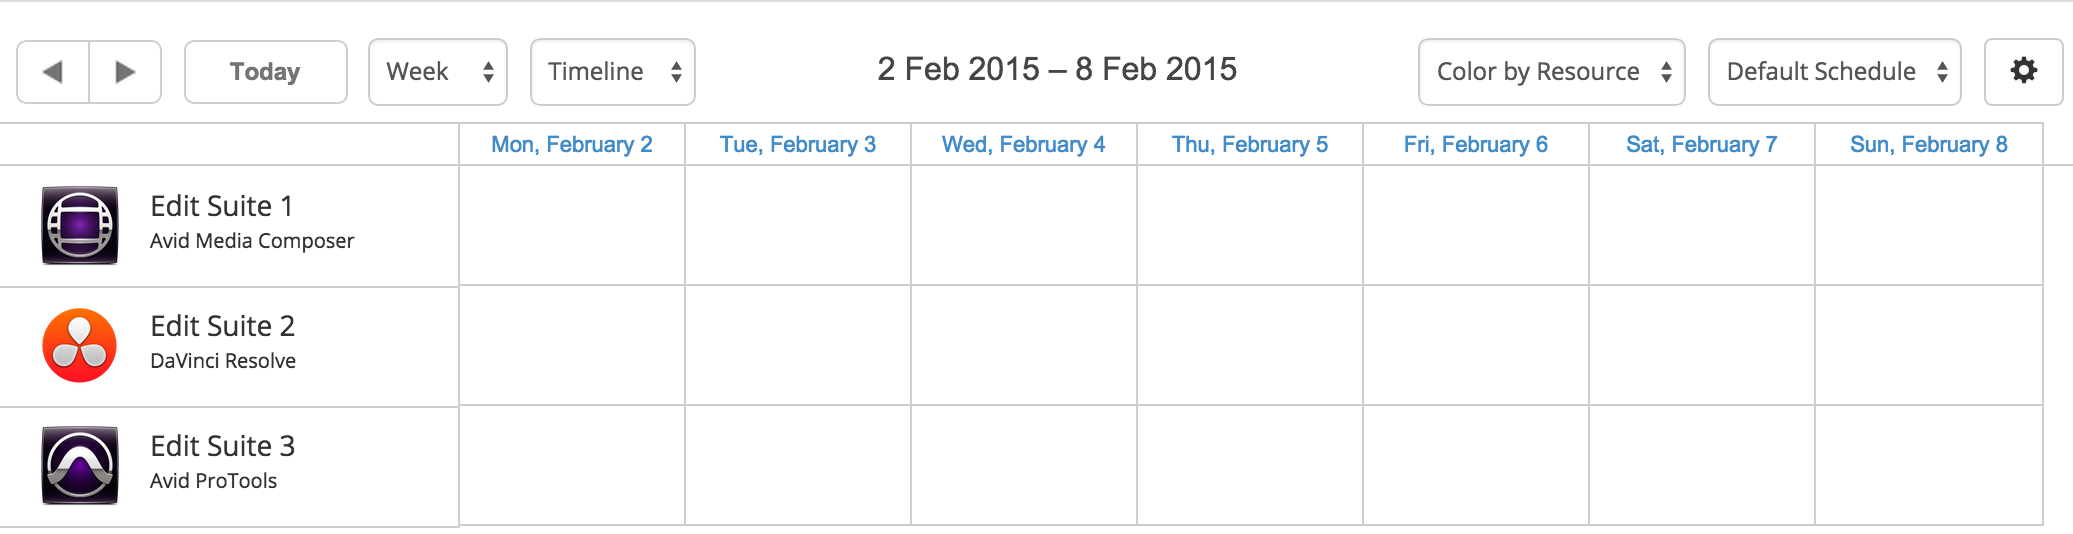
- The icon is used to visually represent the resource in other areas of FoxOMS, for example on the schedule.
For example, the description "Avid Media Composer" has been used to show that this software is installed in this edit suite. The logo for Avid Media Composer has been chosen to provide a good visual reference on the scheduler timeline.
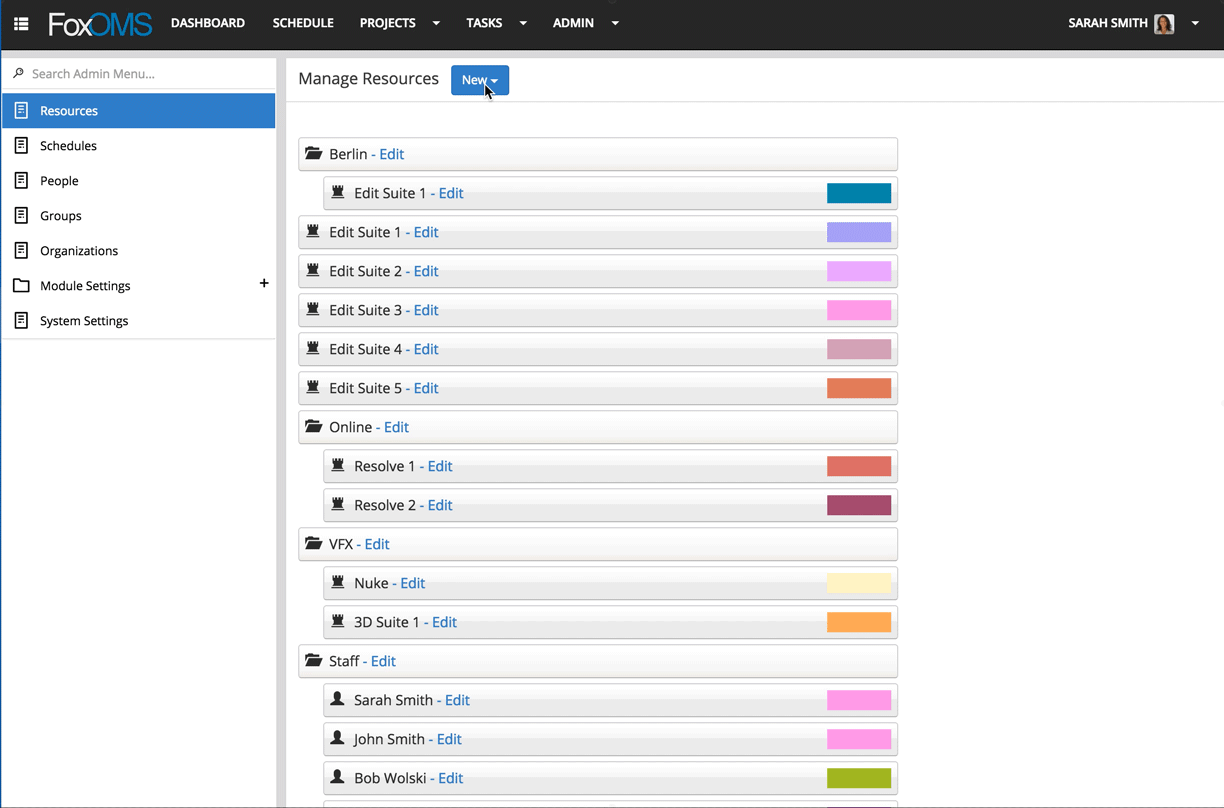
An example of a filled in resource sidebar is illustrated below.
An example of how the resources appear on the timeline schedule
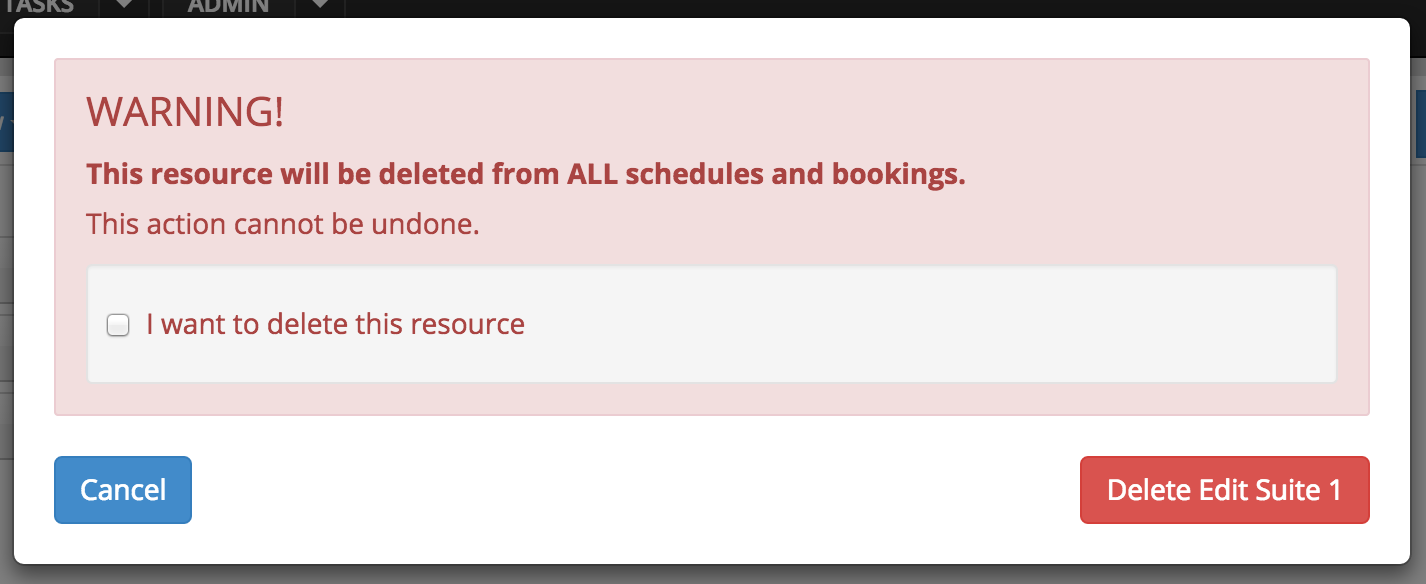
Delete a Resource
To delete a resource go to Admin -> Resources and click Edit on the resource you wish to Delete.
Click the Delete Resource button at the bottom of the sidebar and then confirm that you wish to delete.
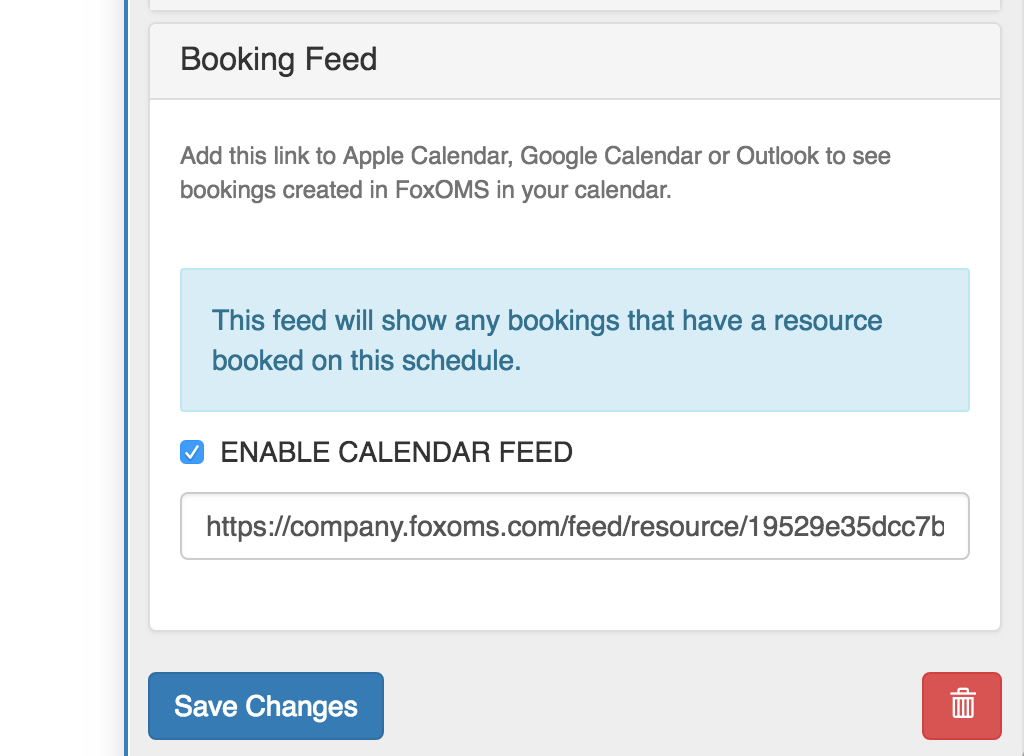
Resource Calendar Feed
If you'd like to get a feed of the bookings shown for a particular resource, you can enable the resource calendar feed by clicking Enable Calendar Feed. This feed can be imported into many standard calendars as explained on our calendar feed page
Danger
The generated link is unique, but needs to be carefully guarded. If someone unauthorised gains access to this link, they will have complete read access to all your bookings.
If you suspect that the link has been comprimised, you can disable, and re-enable the booking feed to generate a new unique link. The old link will no longer work.
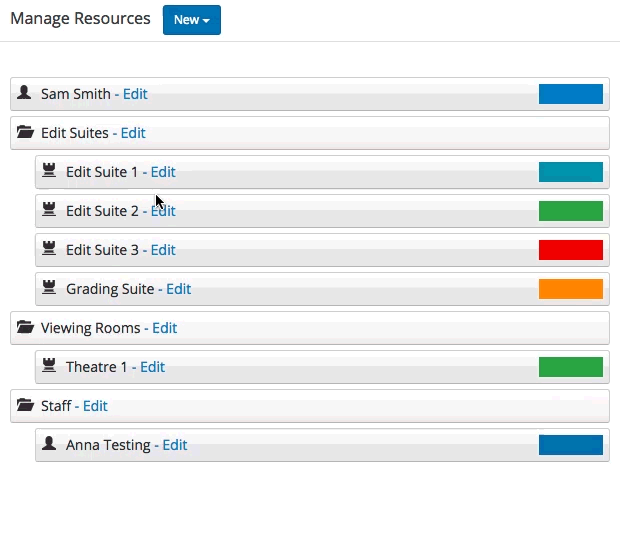
Change Order and Hierarchy of Resources
The order of resources shown on any schedule is defined in the Admin -> Resources screen. Resources can be re-arranged as well as being placed in "Resource Groups" to logically layout your resources.
To re-arrange a single resource or an entire resource group simply drag the resource block and move it to your desired location.
Note
Changing the resource heirachy affects the layout across all schedules