Office 365 (Azure AD)
Manually configure Azure AD
Add Enterprise Application
-
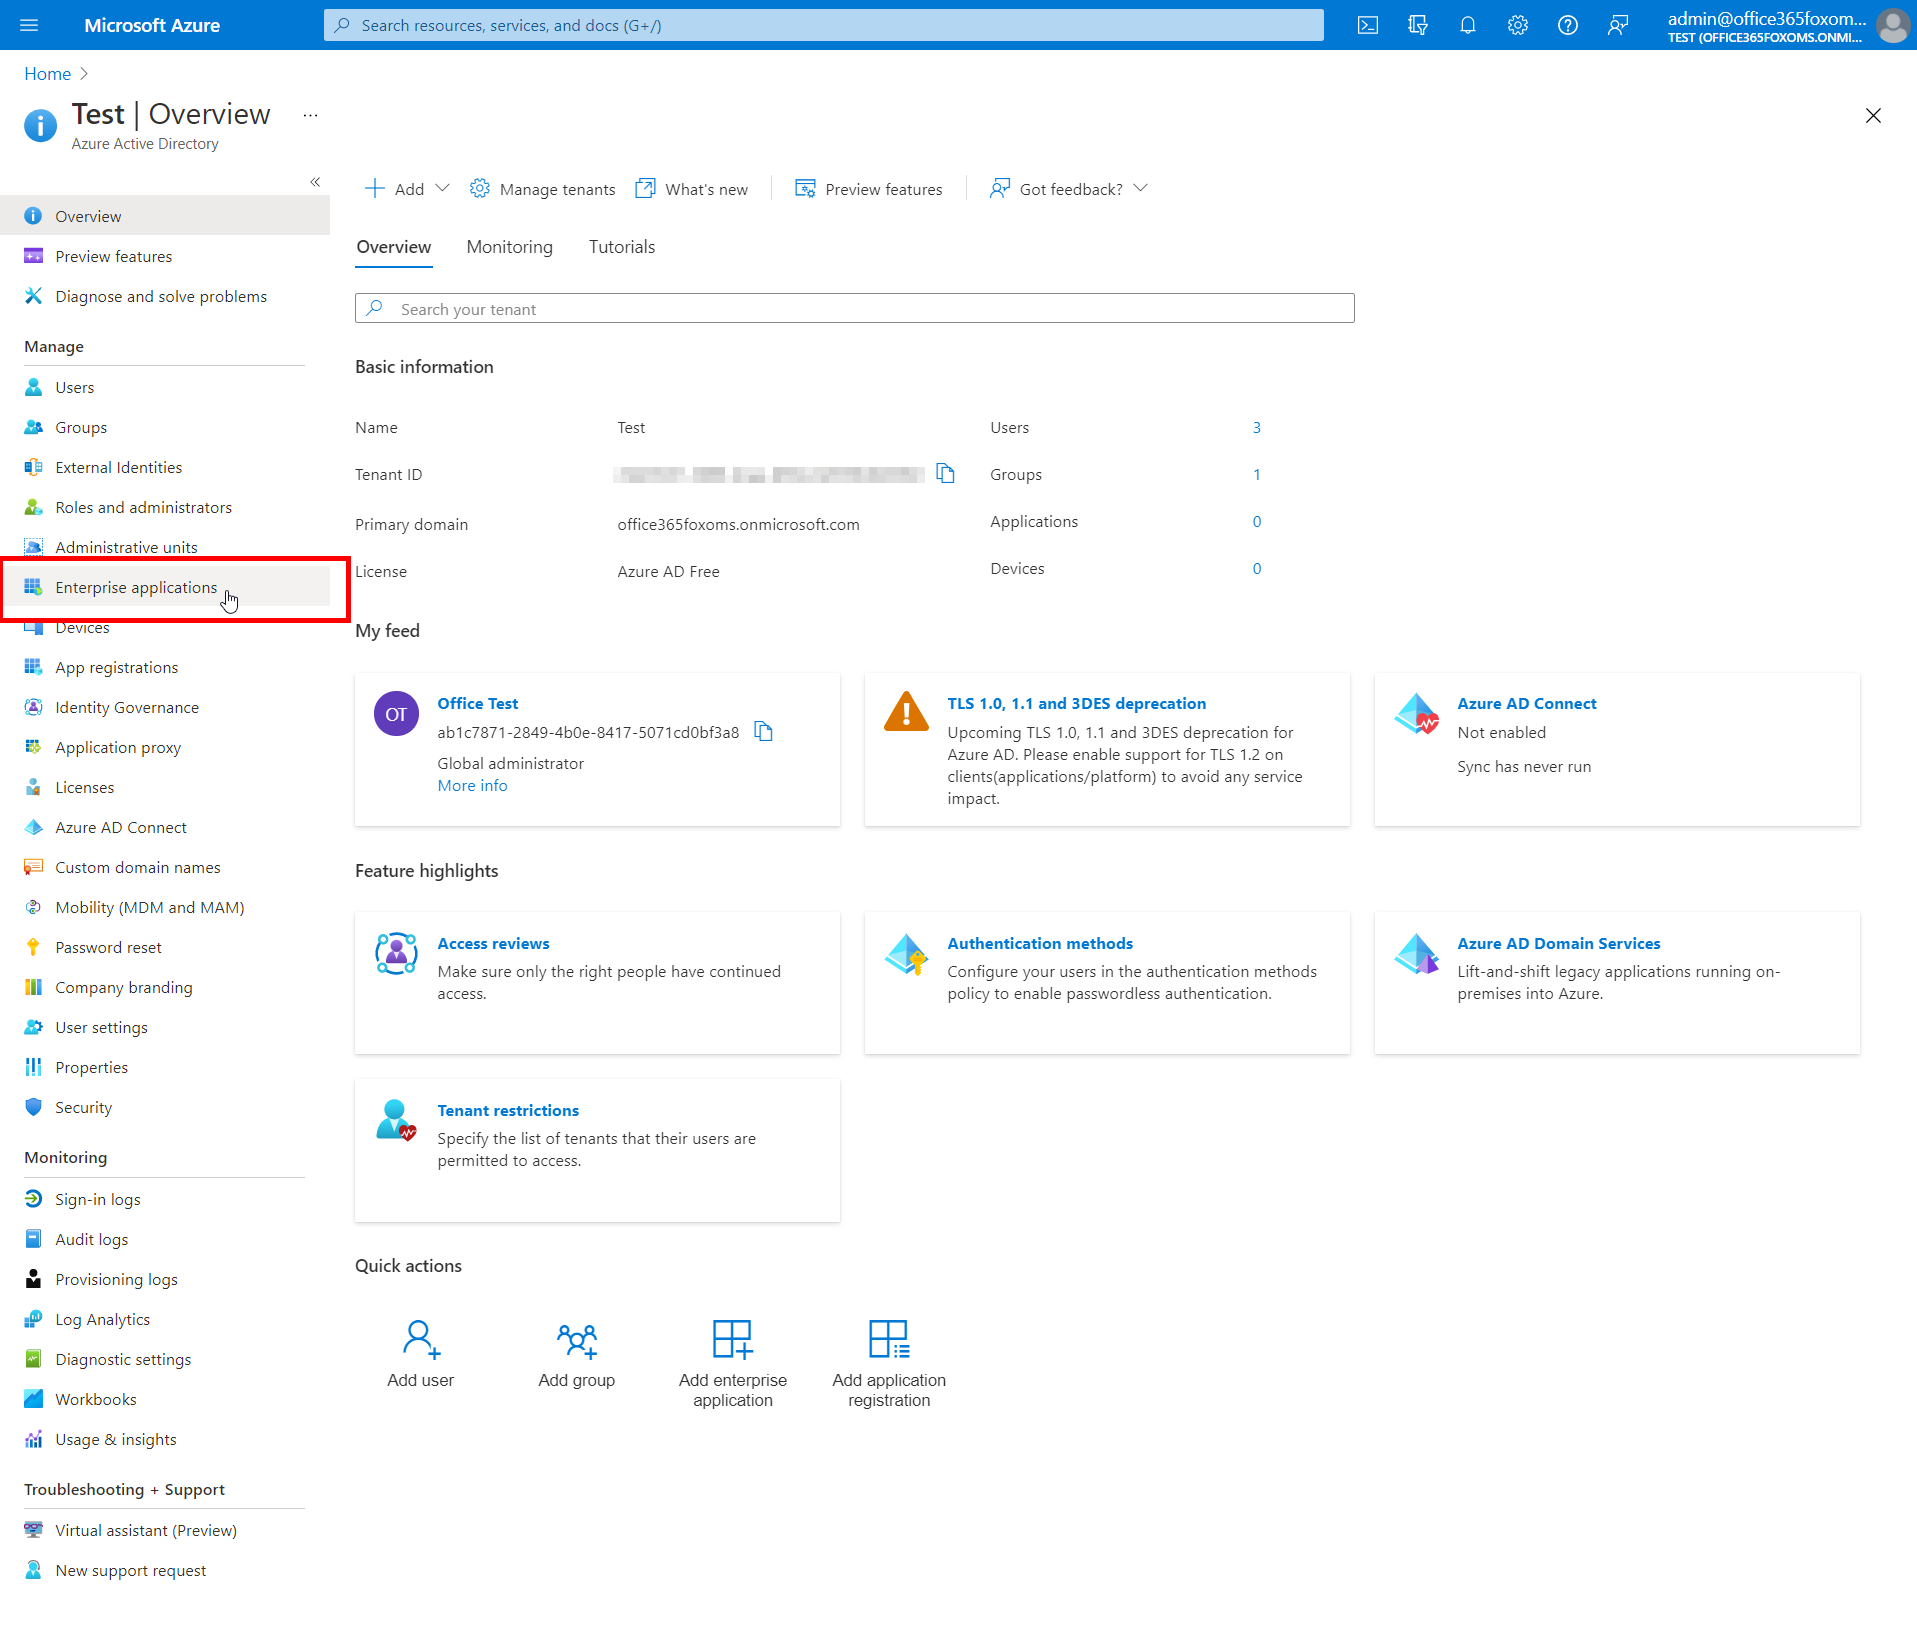
Login to your Azure AD account (https://portal.azure.com) and click on Enterprise applications
-
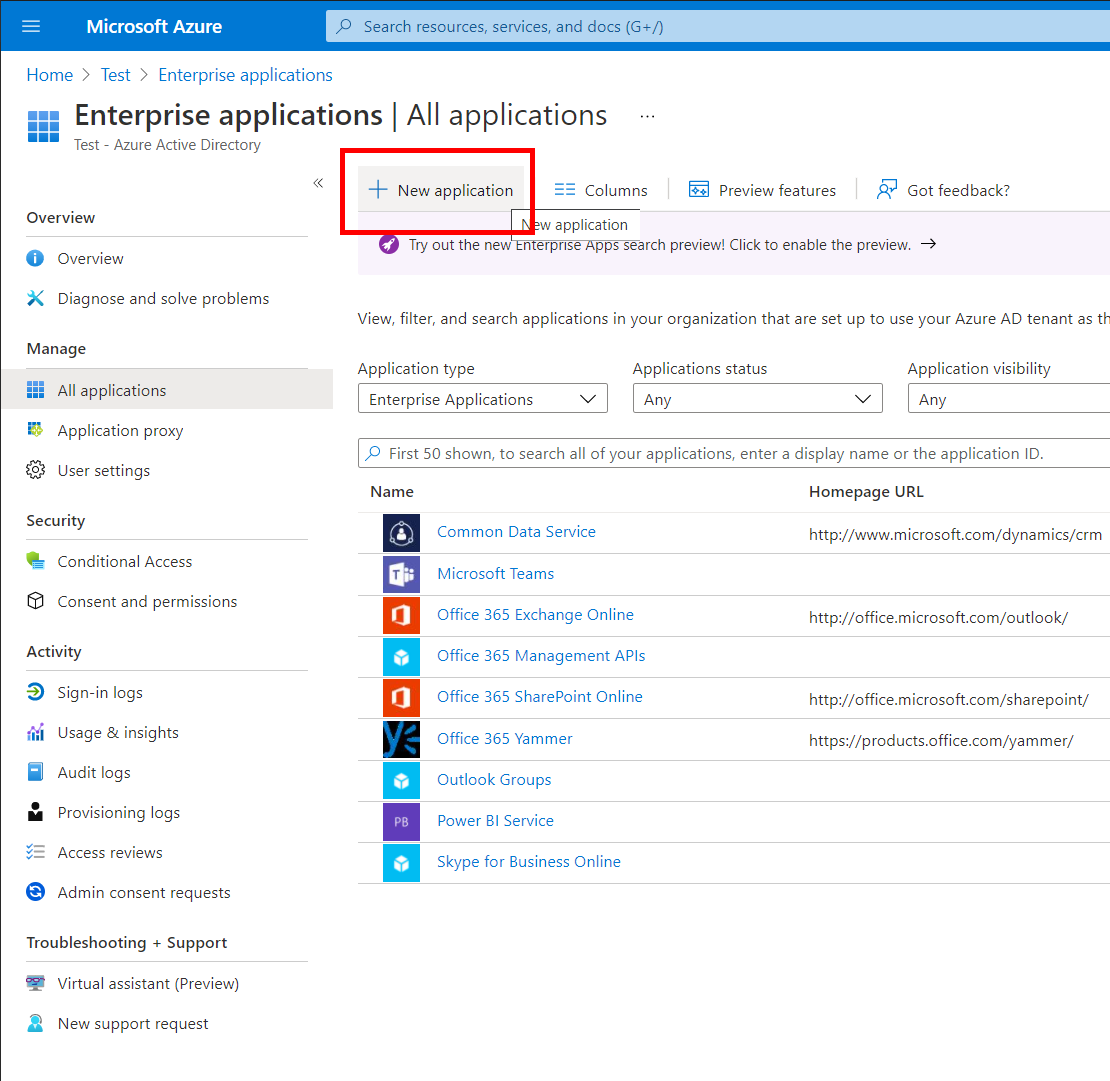
Click on New Application
-
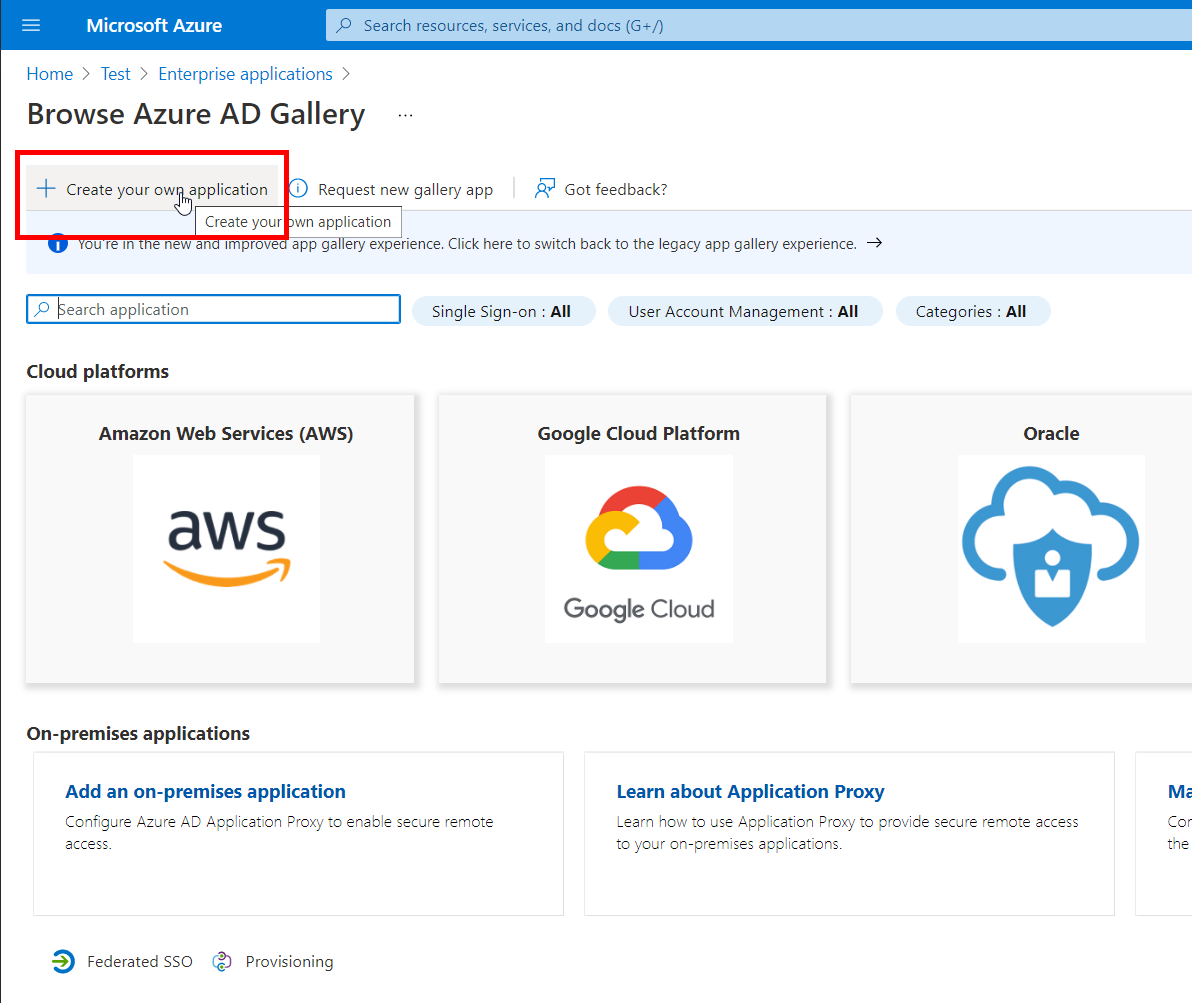
Click on Create your own Application
-
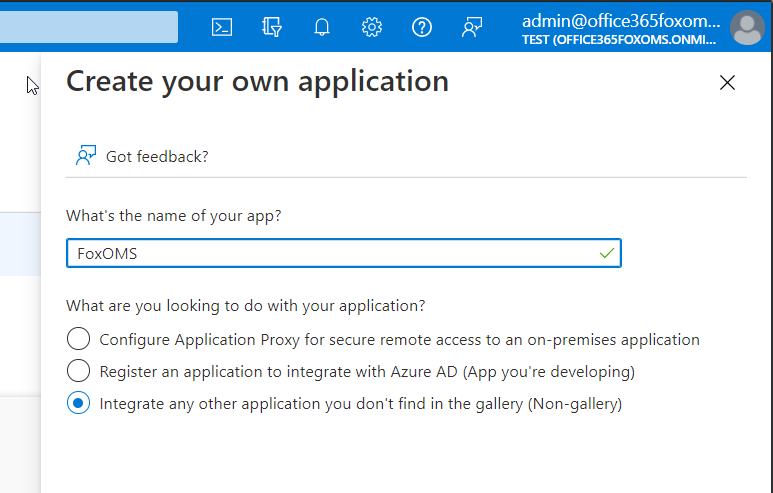
In the sidebar menu, type the name FoxOMS for the application name and select Integrate any other application you don't find in the gallery (Non-gallery)
-
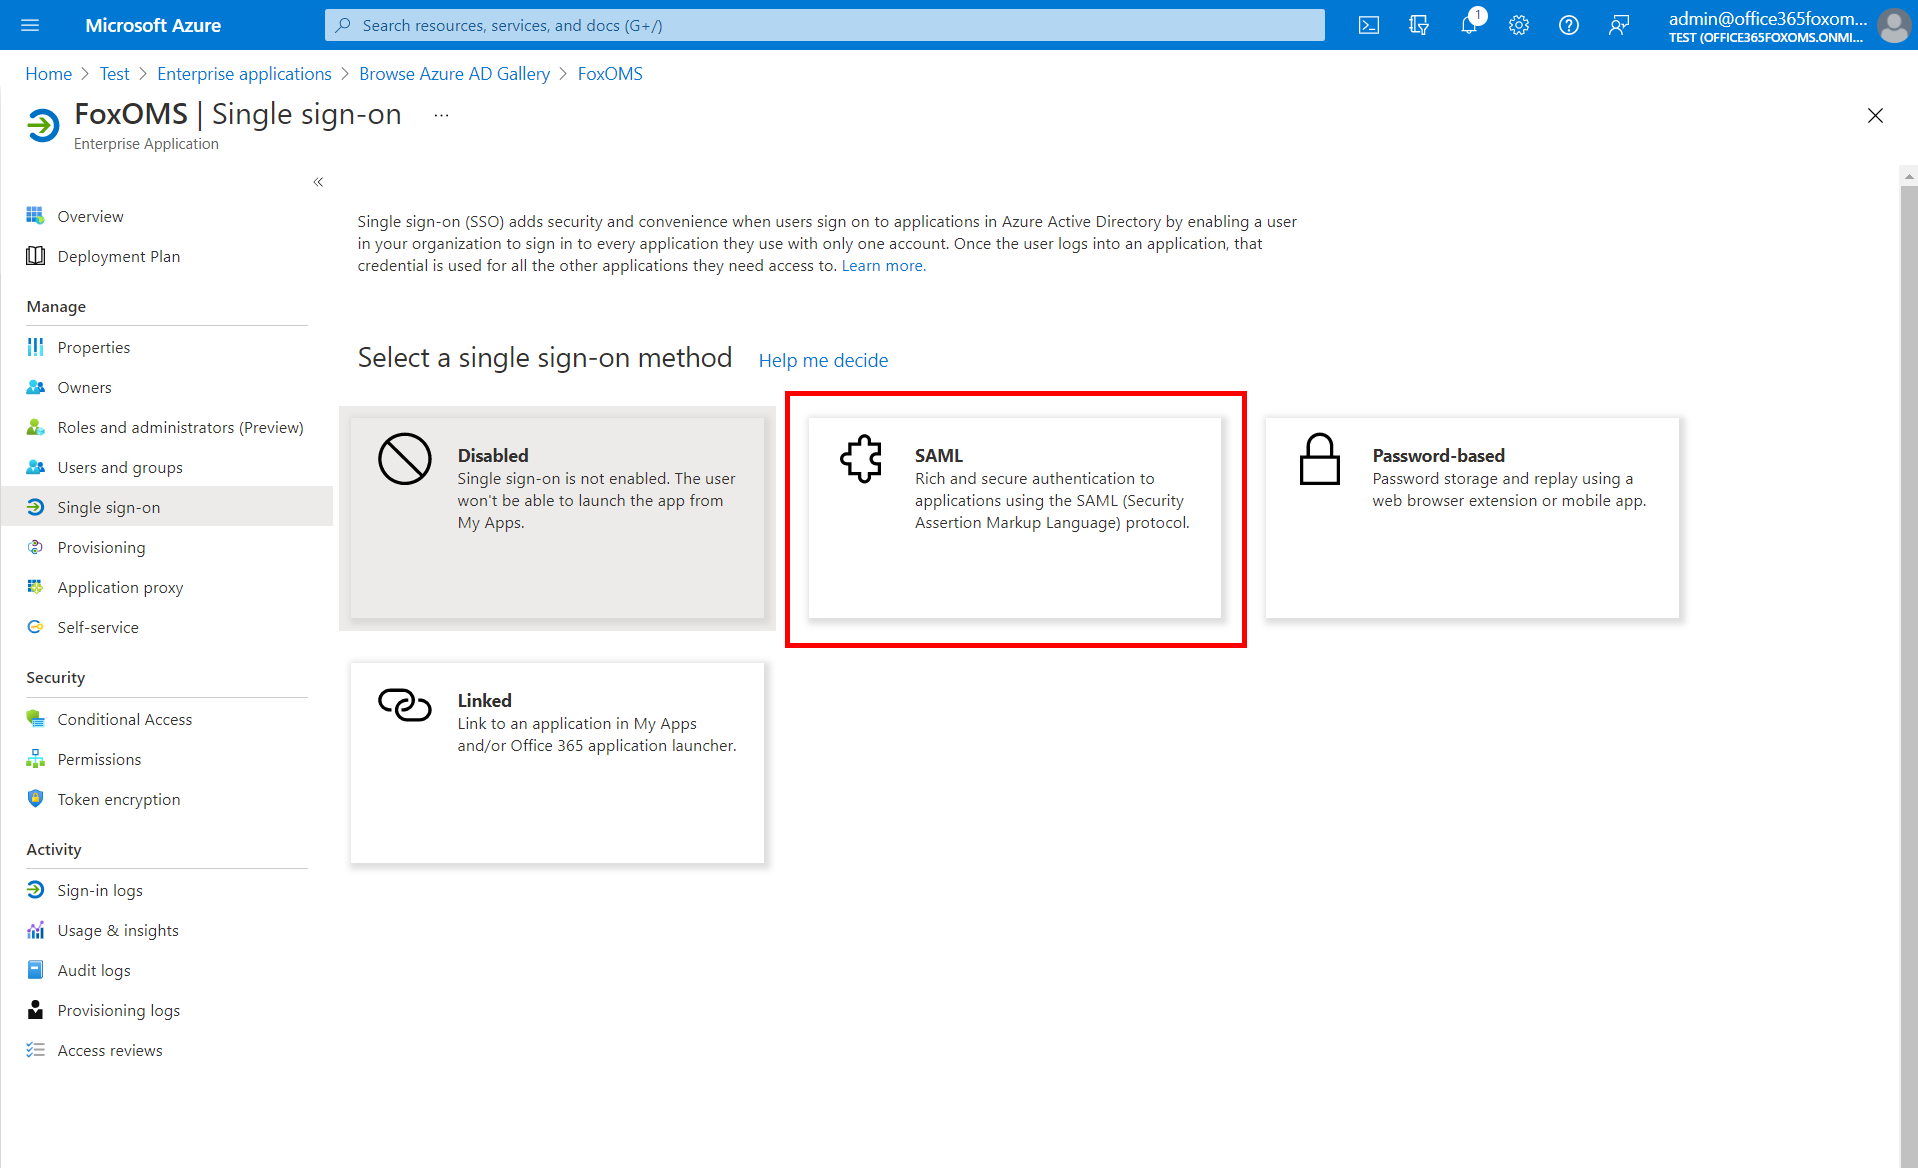
The "FoxOMS" application has now been created. In the sidebar menu, select Single sign-on and then click SAML
-
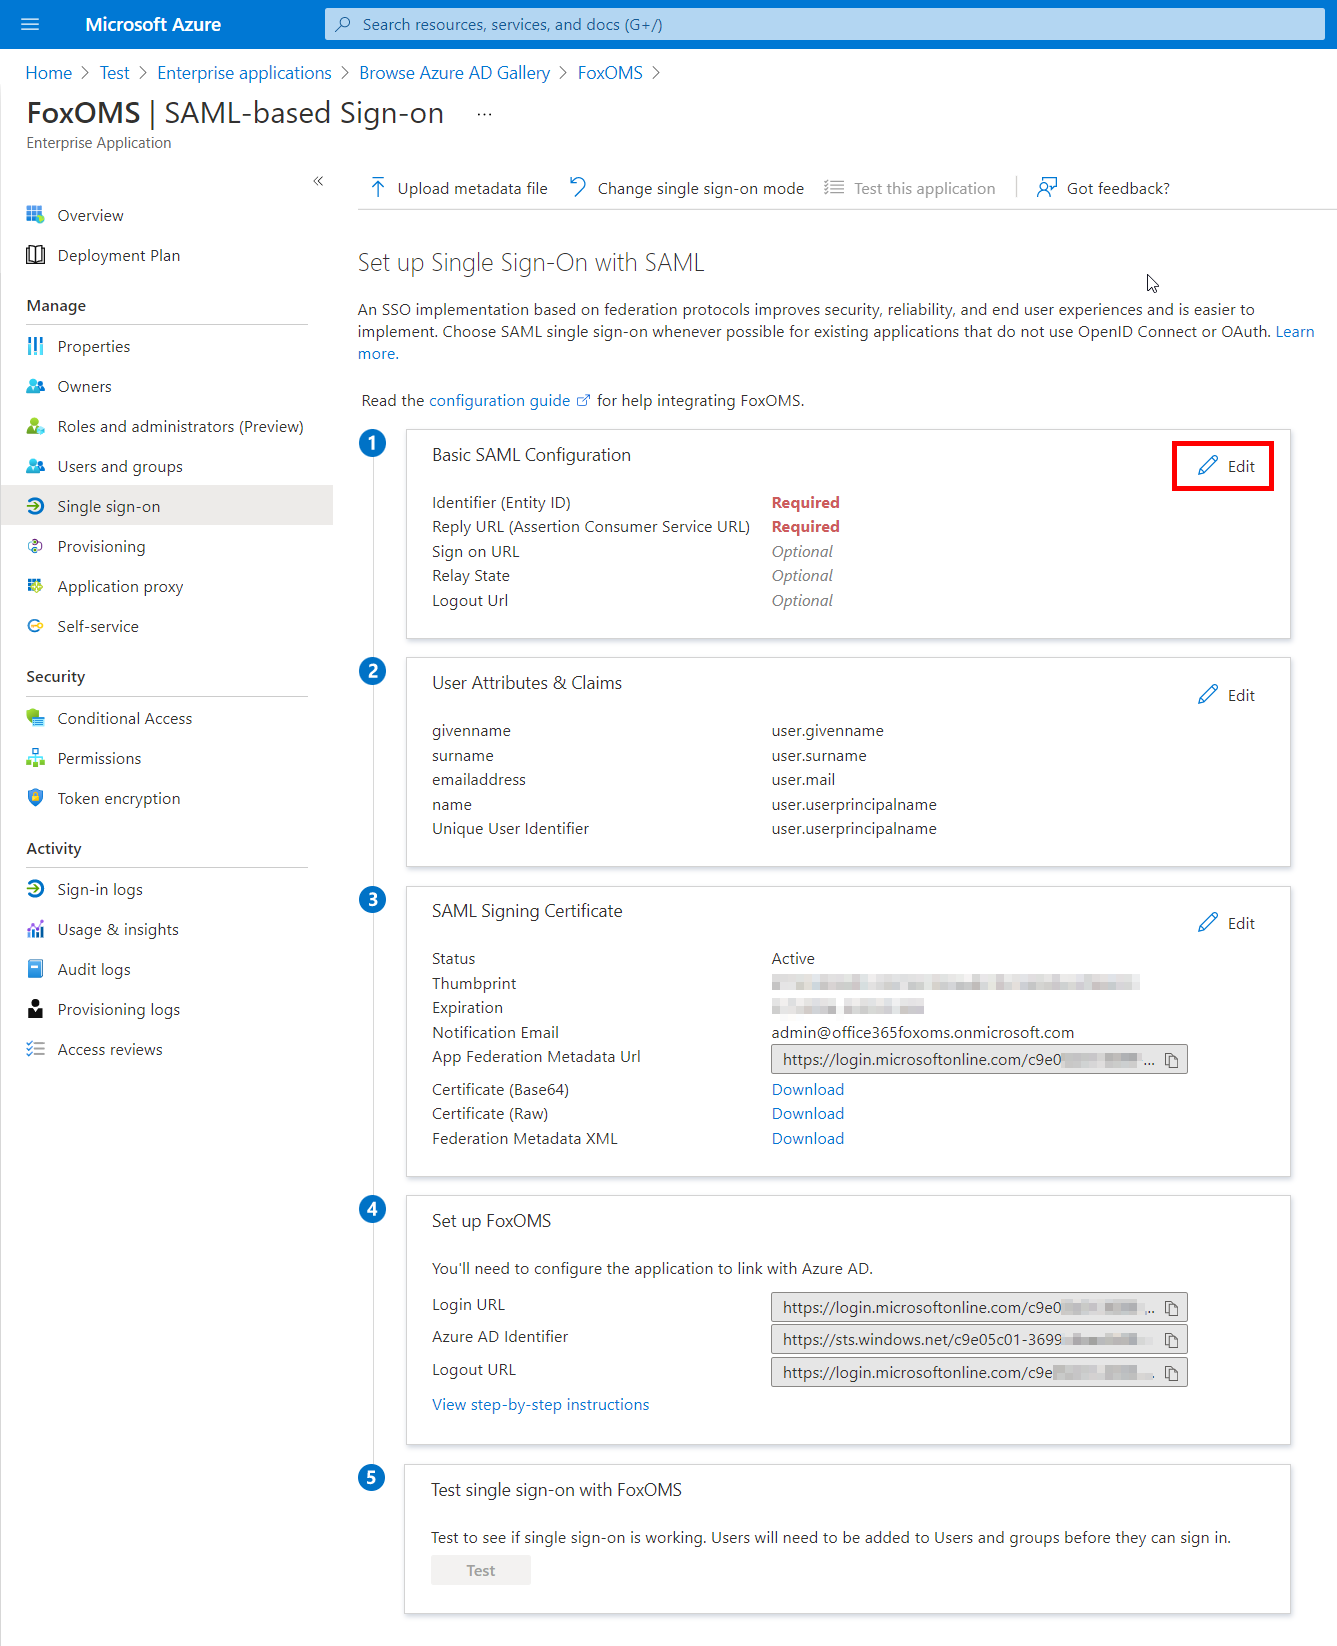
Click Edit in the "Basic SAML Configuration" section
-
In the Identifier (Entity ID) section, please enter the following URL, being sure to replace "YOUR-FOXOMS-SUBDOMAIN" with your actual subdomain
https://YOUR-FOXOMS-SUBDOMAIN.foxoms.com/sso/metadataIn the Reply URL (Assertion Consumer Service URL) section, please enter the following URL, being sure to replace "YOUR-FOXOMS-SUBDOMAIN" with your actual subdomain
https://YOUR-FOXOMS-SUBDOMAIN.foxoms.com/sso/acs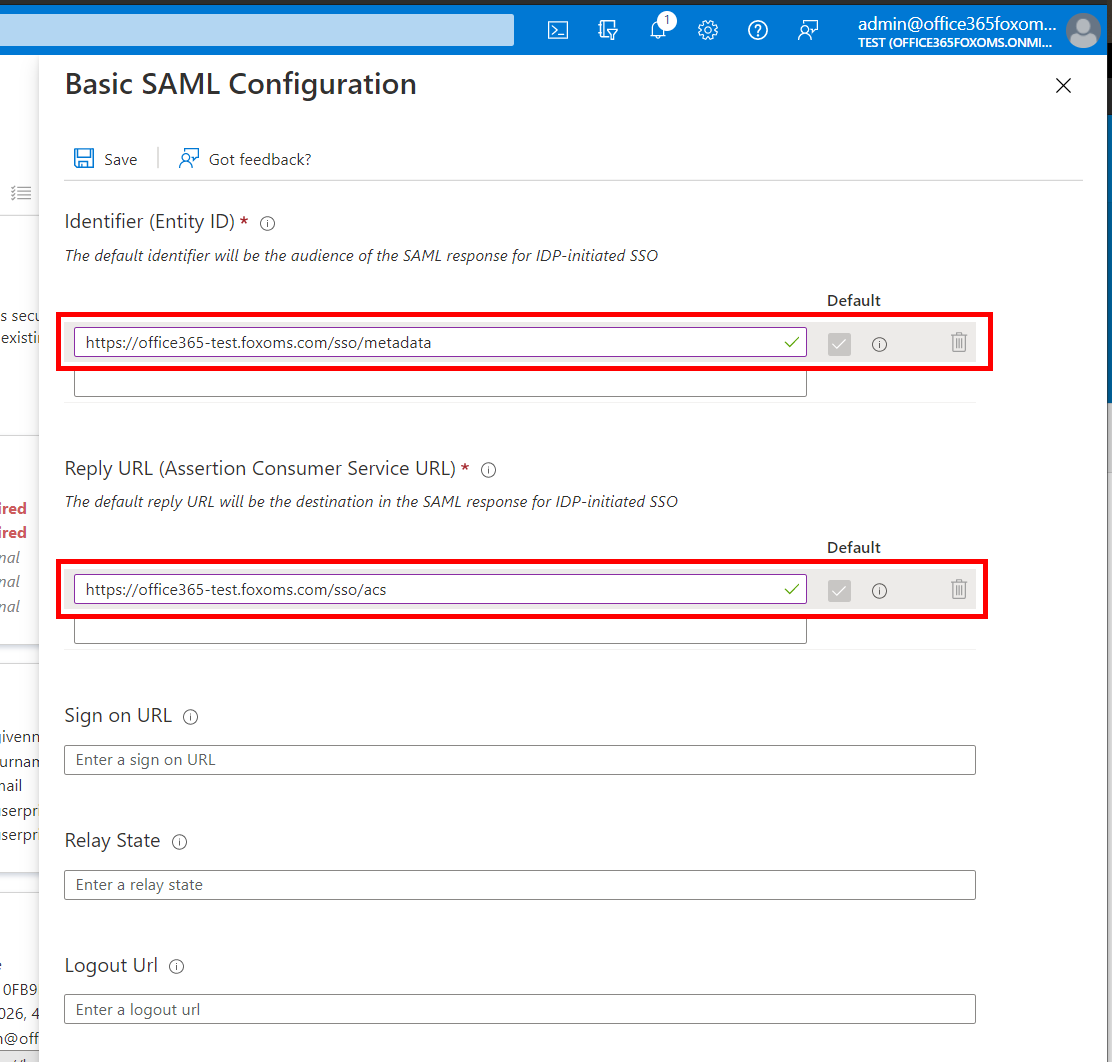
Finally, click Save
Configure FoxOMS
- Open the FoxOMS SAML SSO settings page in the Admin section of your FoxOMS account in a new window or tab.
- Set the Enable SAML SSO menu to Yes
-
In the Identity Provider Settings section, please set the following parameters:
- Connection Name / Label to Office 365
- IDP Entity ID / Issuer URL to the value provided in the Azure AD Identifier text box
- IDP Login URL / SSO Endpoint to the value provided in the Login URL text box
- IDP Logout URL / SLO Endpoint to the value provided in the Logout URL text box
- Download the Certificate (Base 64) from the "SAML Signing Certificate" section and open in a text editor on your computer. Select all the contents and paste it into the IDP X.509 Certificate section in FoxOMS
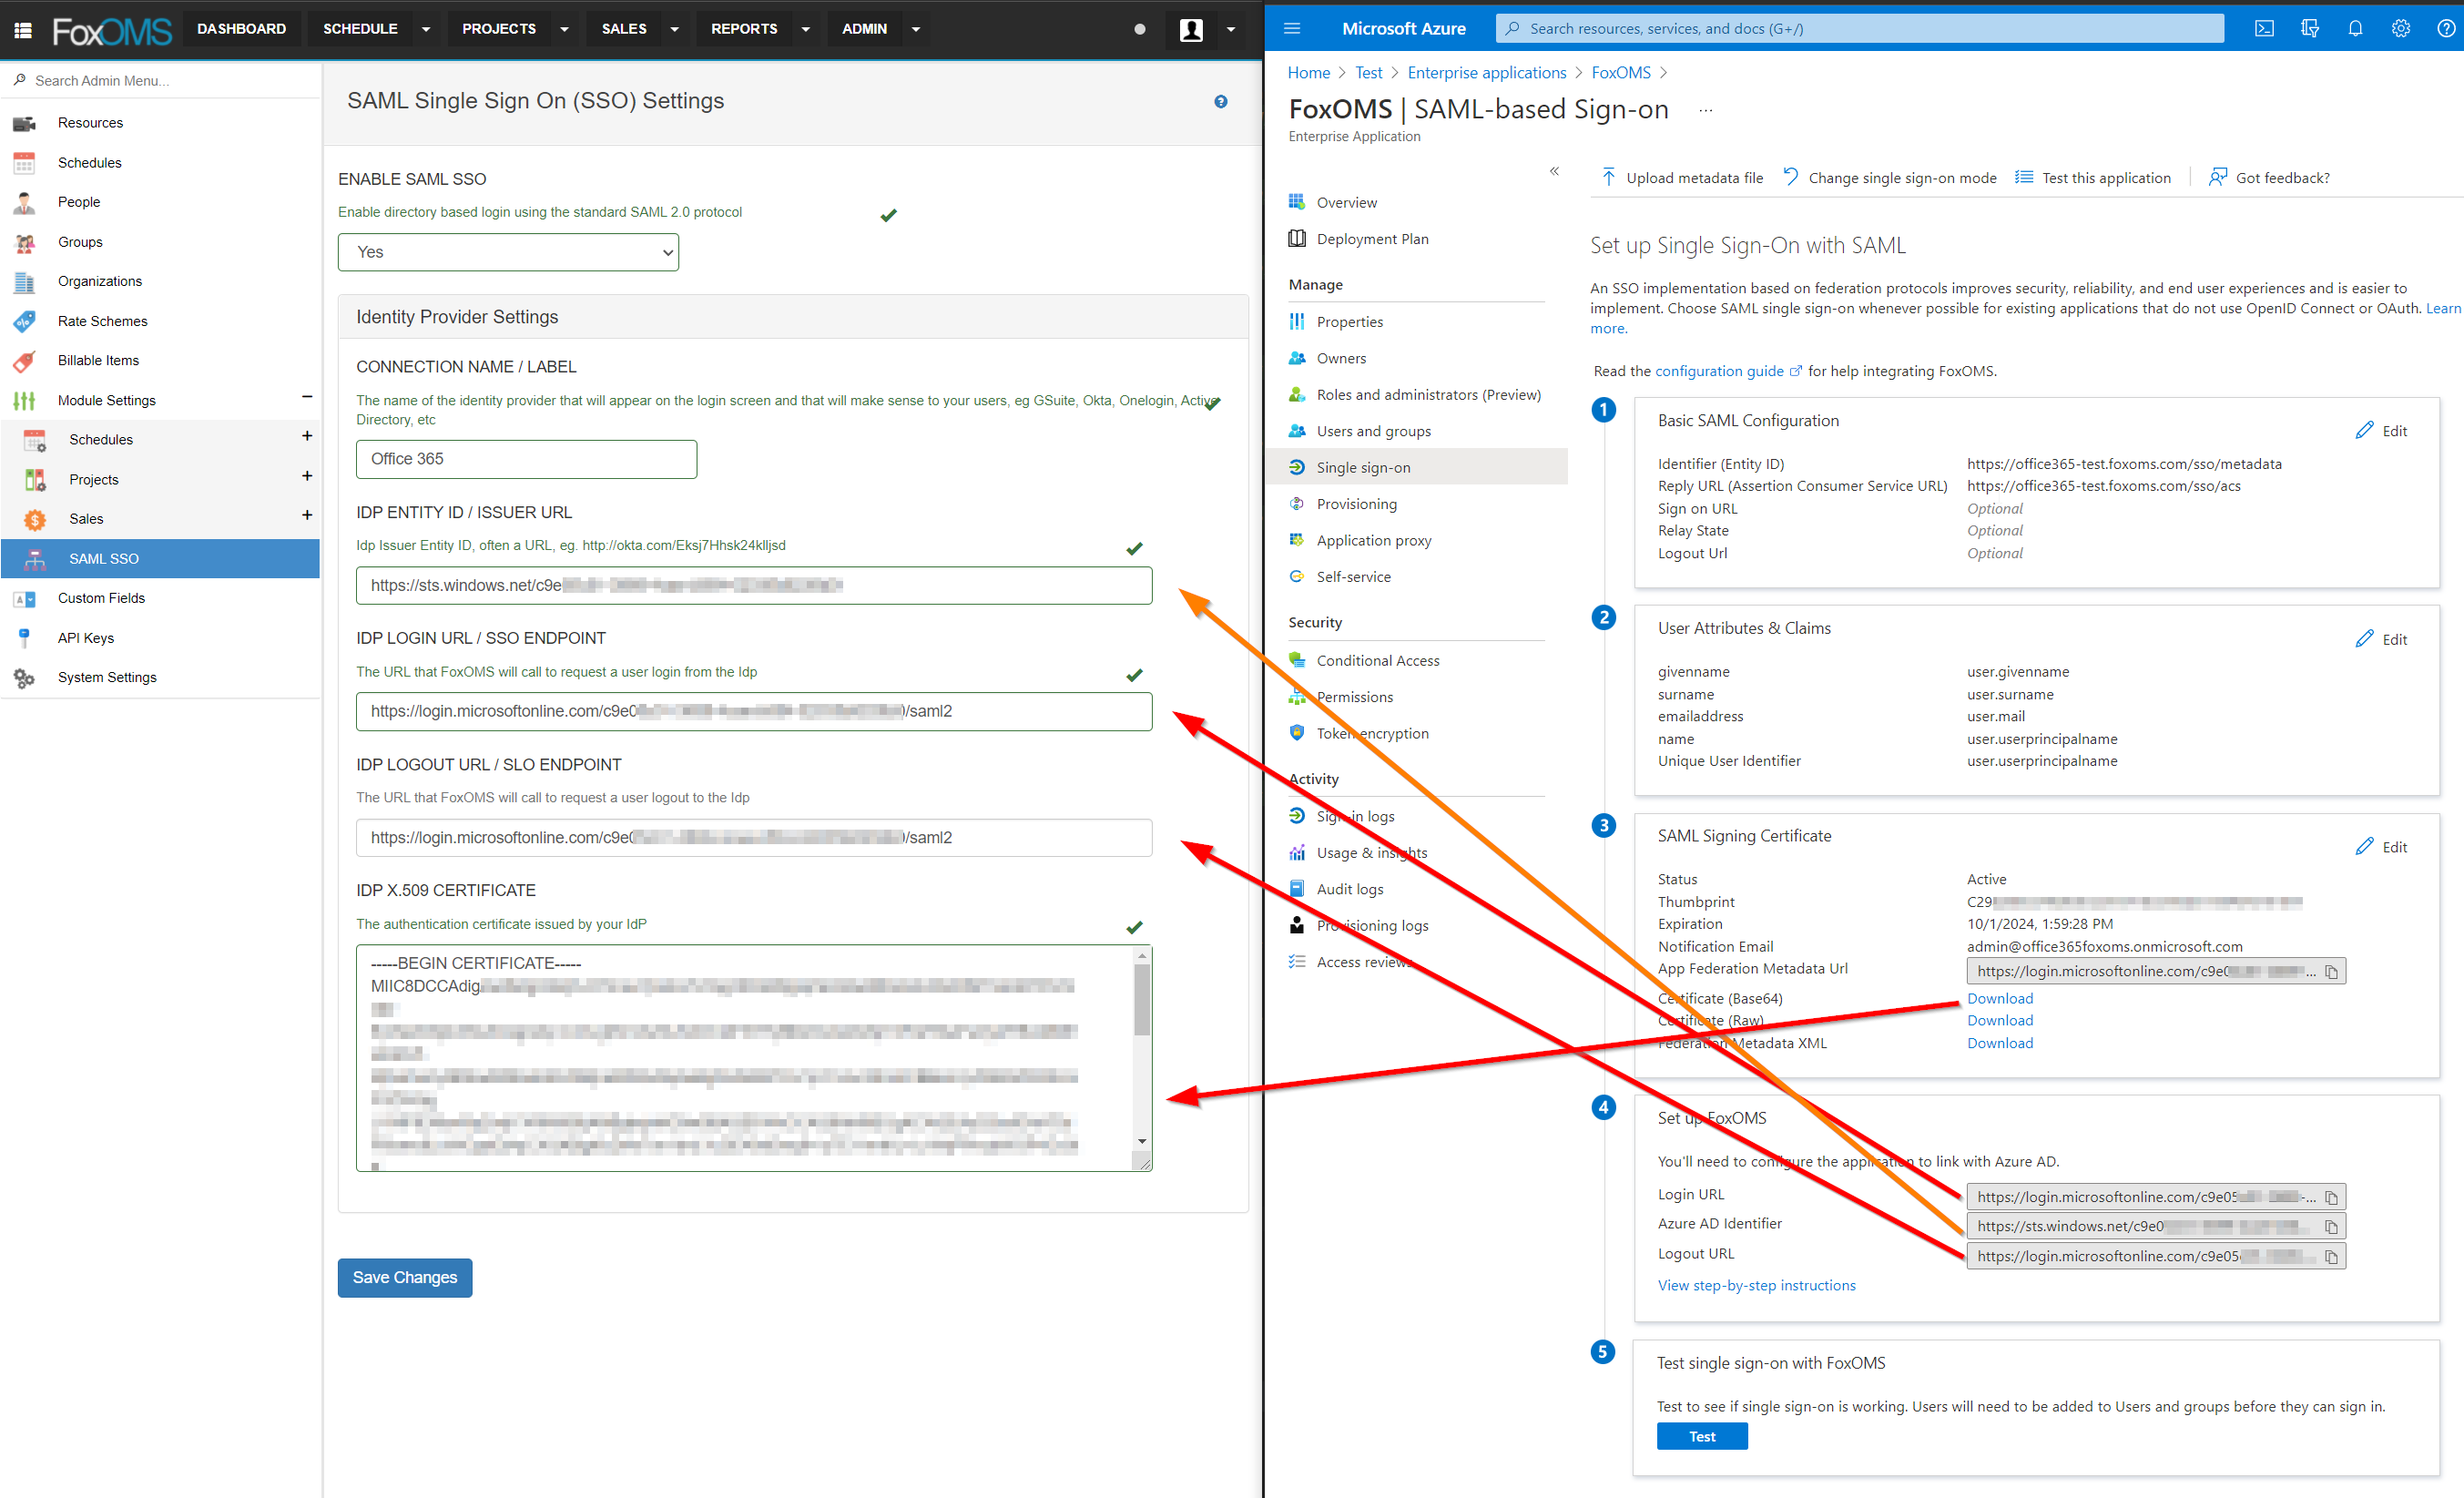 4. Click Save Changes in FoxOMS
Giving access to users
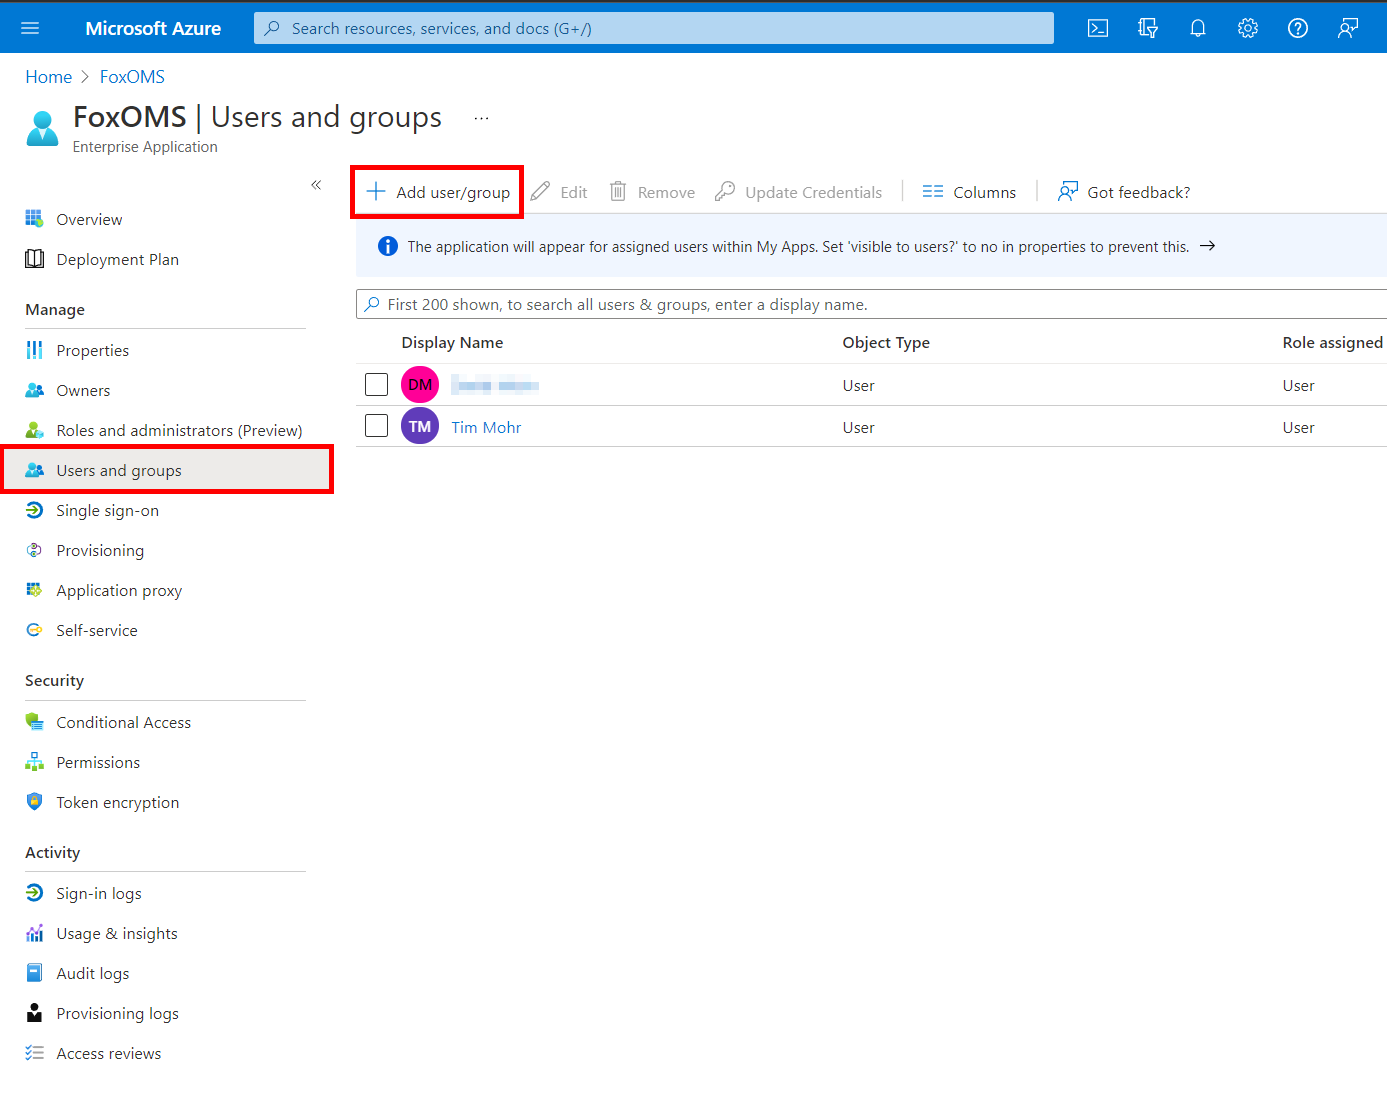
Before users can start to access FoxOMS with their Azure AD account, they need to be given access to the Enterprise Application.
To provision access, click on Users & Groups and then click Add user / group
