Custom Fields
Tip
To access these settings, you will need to be in a group that has access to the Admin Module
Custom fields (also known as "user defined fields") allow you to extend the FoxOMS database and further customize the data you collect and display within FoxOMS.
Types of Custom Fields
There are currently three types of custom fields that can be created.
- Text Input
- Select Menu
- Textarea
The select menu allows users to choose from a set of predefined values, where as the text input can allow input of any letters, numbers or symbols. The textarea allows multi-line input.
Fields can also be set to always require a value to be selected or entered.
Custom fields are setup on a per object basis. For example, you can setup a custom field to only appear within bookings or projects.
FoxOMS objects with Custom Field Support
The following objects have custom field support, which means that you can add additional metadata to these objects to track additional data and better fit your workflow.
For example, you could add a "Type" field to bookings, with potential values of "Grading, Offline, Online" which would allow you to set each booking to a certain type, and export that information along with the rest of the booking data.
| Object | Notes |
|---|---|
| Bookings | |
| Projects | |
| People | |
| Organizations | |
| Quotes | |
| Invoices | |
| Quotes & Invoices | Fields and their values appear on both quotes and invoices. Quotes that are converted to invoices also retain these values as they are migrated. |
Create/Edit a Custom Field
To create a custom field click on the New button in Admin -> Custom Fields.
To edit an existing custom field, click on the field name within the custom fields table.
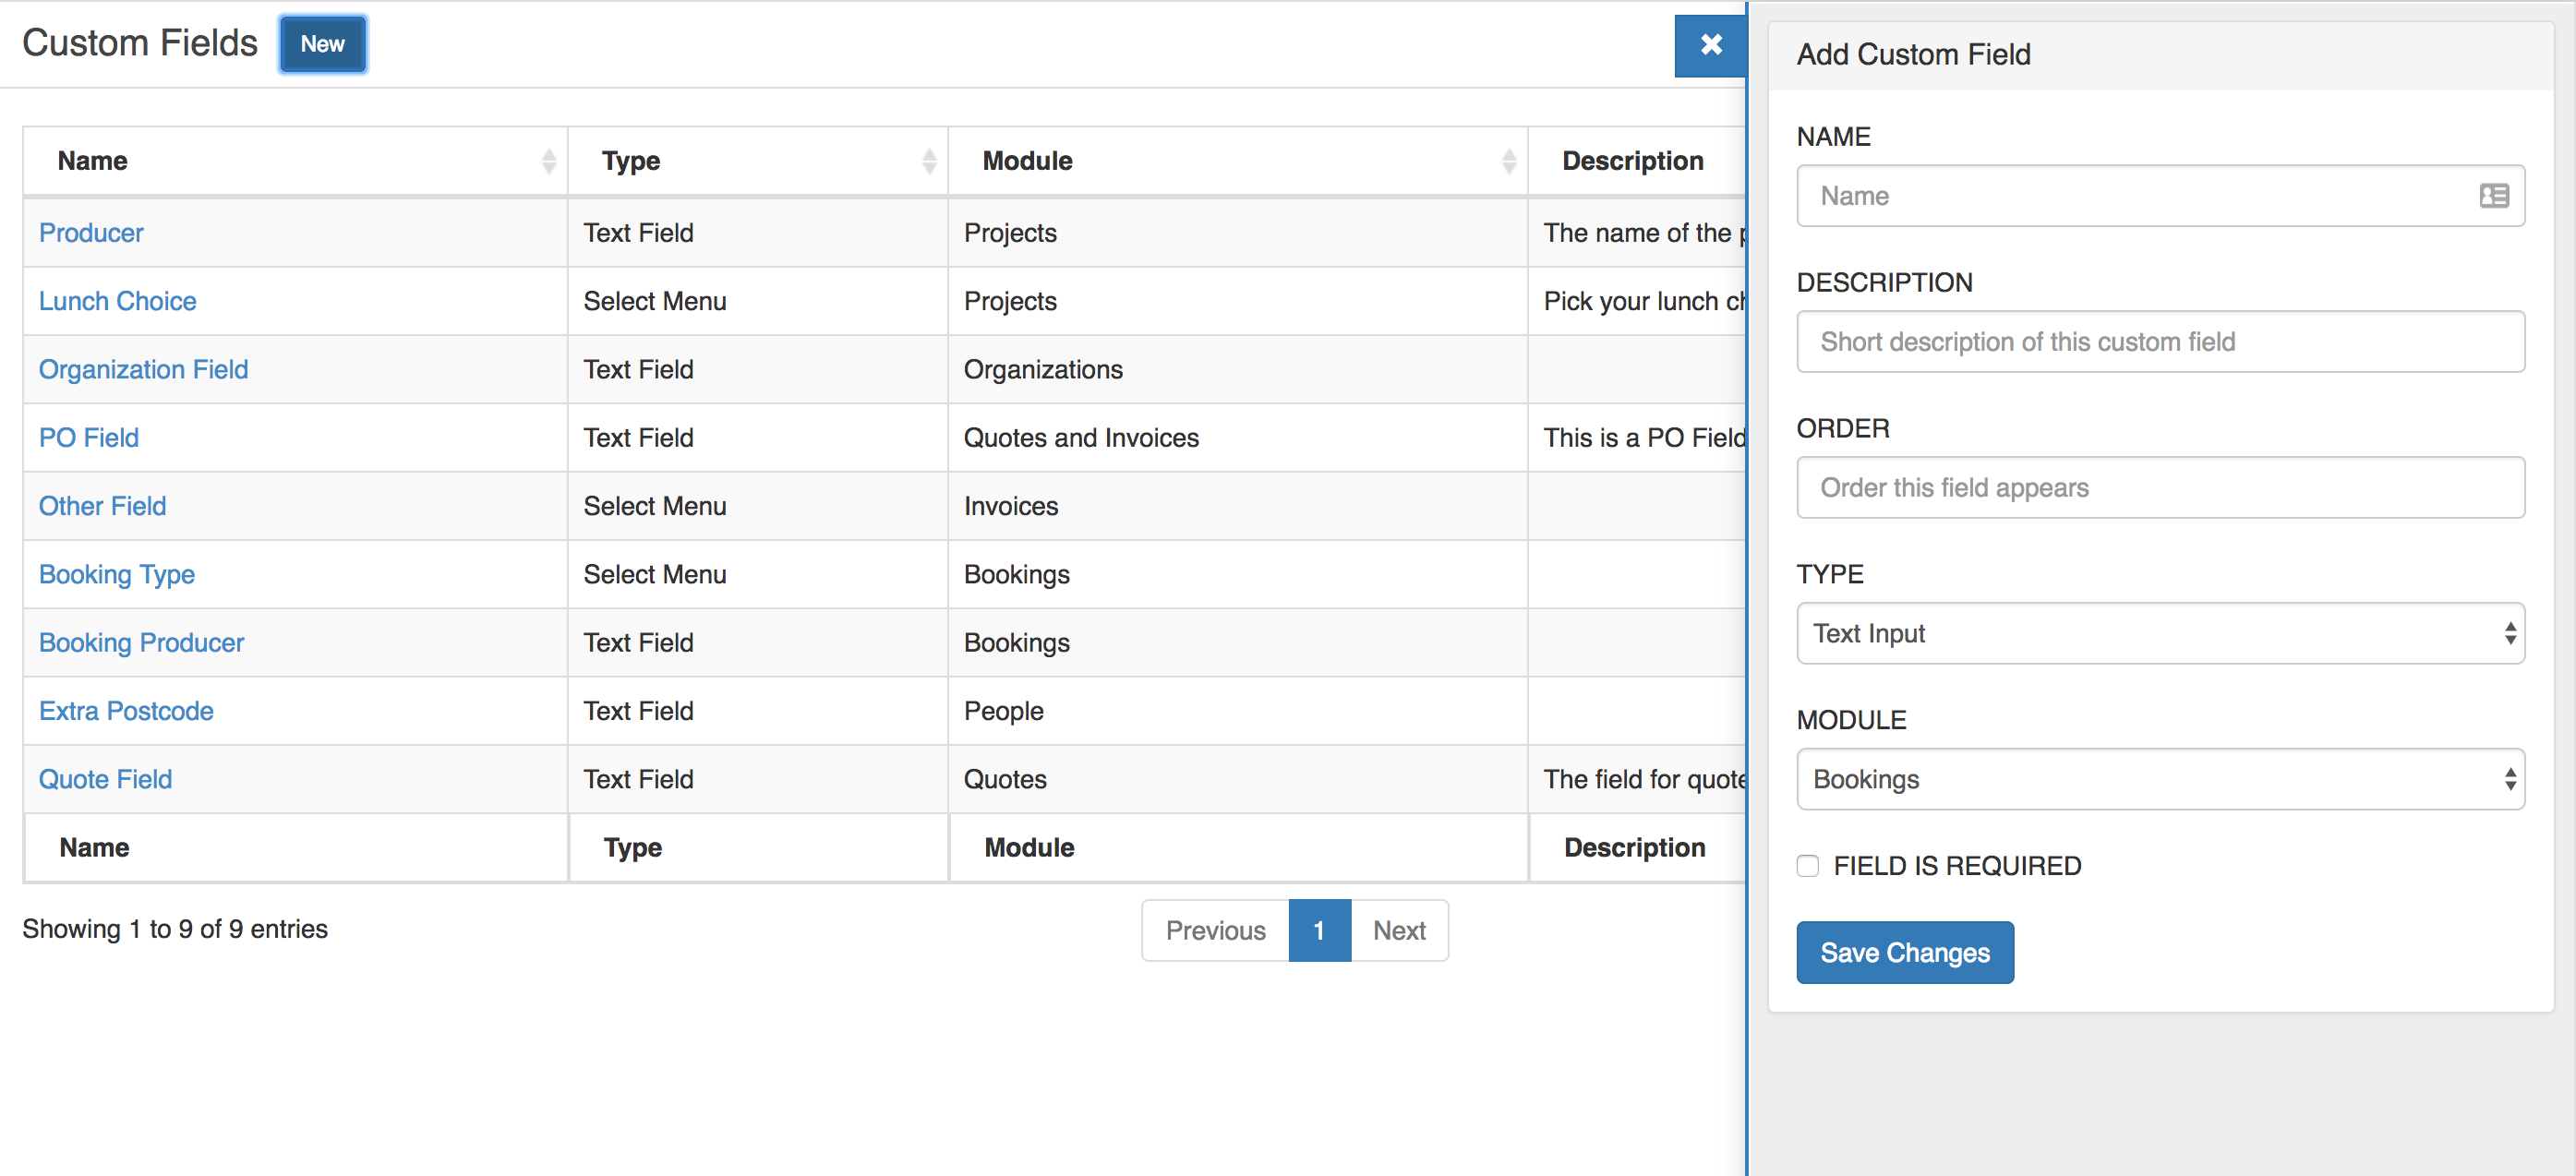
- Fill out the name of the Custom Field (this is used as the label for the input when displayed on a form).
- Choose the type of custom field, either Text Input, Select Menu or Textarea in the type field
-
If you choose Select Menu a blank input will appear under the options label. Click the "Add Field" button to add more options. Fill out as many options as required.
Options can also be re-arranged by dragging the :::: pattern next to the field.

-
(Optional) Mark the field as required to prevent forms from submitting without any values being selected
Delete a Custom Field
To delete a custom field, click on the scheme under Admin -> Custom Fields and click the 'trashcan' in the bottom right hand corner of the sidebar.
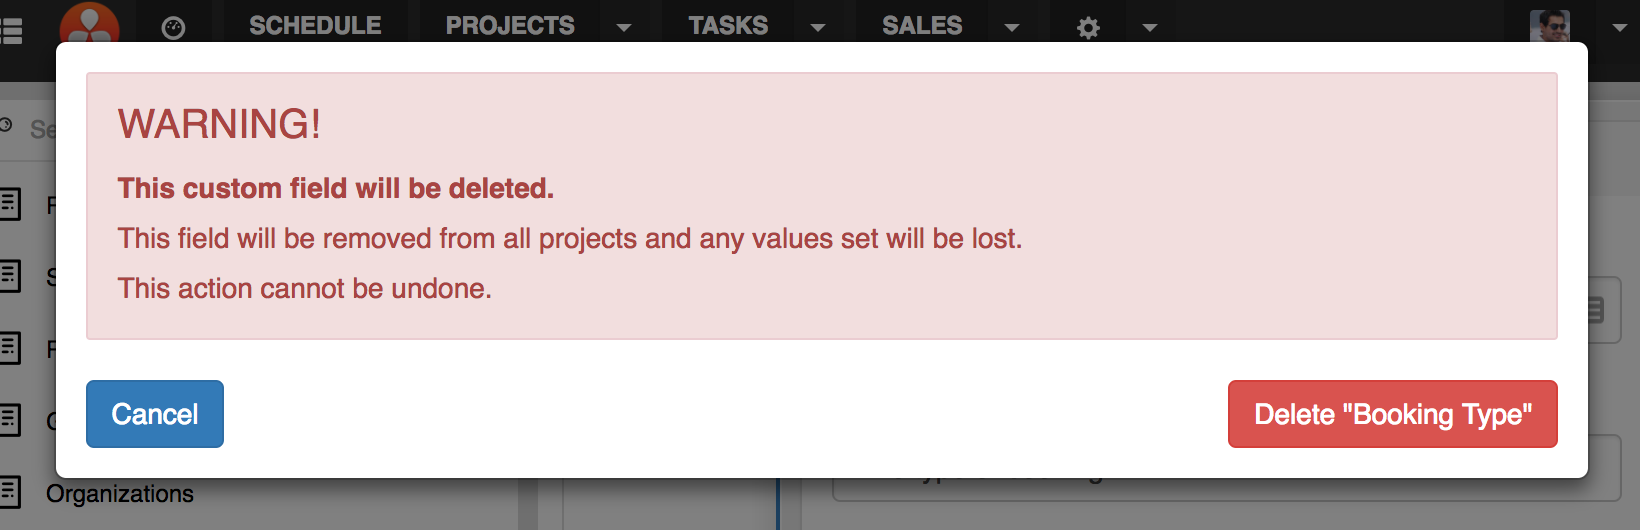
Press the 'Delete' button on the confirmation window to proceed.